
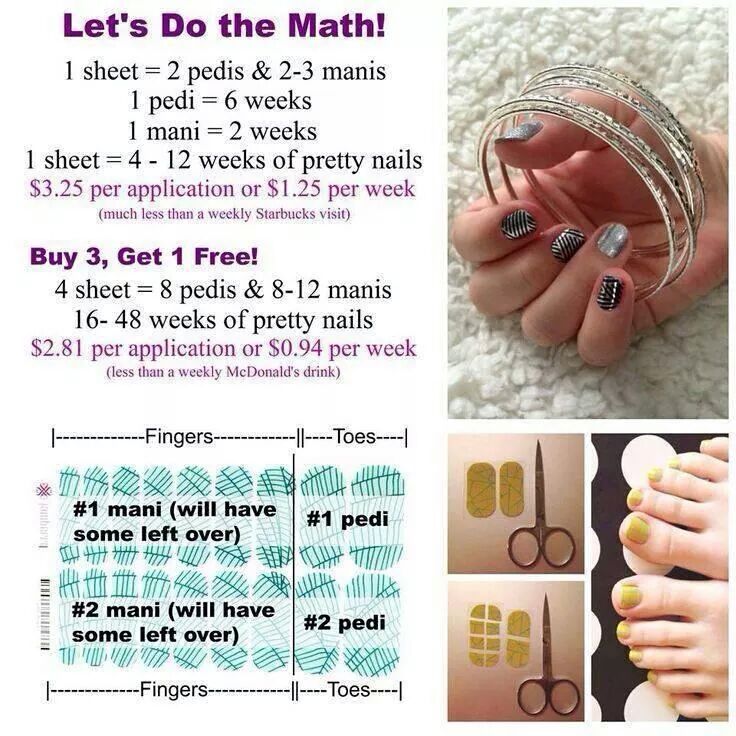
I was recently introduced to Jamberry nails from a friend and I couldn’t believe the amount of different designs that are available. I was use to using fake nails to create a fun and unique look that I couldn’t create on my own. Think of any design you want, and 99% of the time they will probably have it. If you get a moment be sure to browse all the different nail sticker options. Another benefit besides all the design options you have is that no glue is required to apply, in short you use a hair dryer to heat up the desired sticker and apply straight to the nail. Be sure not to apply over any polish as the sticker won’t last as nearly as long. When applied correctly, the stickers can last up to 2 weeks and one sheet can be used for a full manicure and pedicure. Order your Jamberry nails here or click for more information.
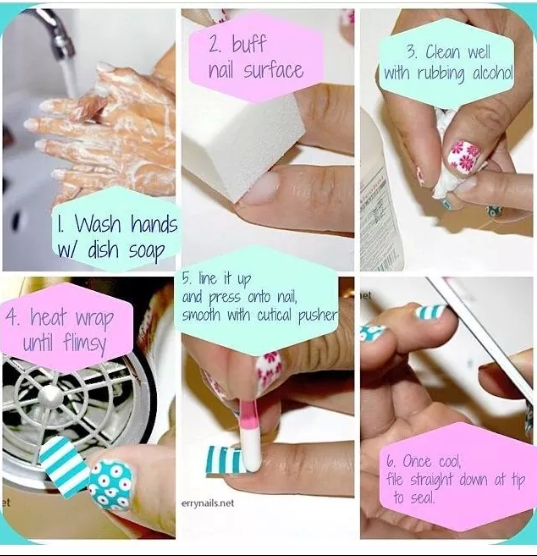

To Apply:
Step 1: Clean nails with nail polish remover or alcohol.
Step 2: Cut and file nails to desired length and shape.
Step 3: Buff top of the nail, clean once more with nail polish remover or alcohol, and push back cuticle.
Step 4: Match nail (finger or toe) to the nail shield that best fits.
Step 5: Peel off nail shield and warm with a blow-dryer 10-15 seconds or until soft and flexible.
Step 6: When warm, press the shield onto the nail. Apply firm pressure around edges to adhere the shield to the nail. Use rubber cuticle pusher to seal the shield around the cuticle.
Step 7: Trim the top with scissors and file off remaining shield using a downward motion to remove excess.
Step 8: Apply heat and pressure to the shield again until it is sealed to the nail. (Repeating this step several times helps create a tight seal to the nail surface and increases wear time)
How to remove:
Quick Removal Process: Heat the shields with a blowdryer for 15 seconds. Then break the seal by getting under the edge of the shield with your opposite thumb nail. Slowly peel the shield from side to side. If the Nail Shields are not peeling easily or the adhesive is still bonded to the nail bed then follow the Gentle Removal Process.
Gentle Removal Process: Soak the Nail Shields in nail polish remover for 20-30 seconds and gently rub them off. Soaking will break down the adhesive bond and allow them to easily slide of the nail bed.
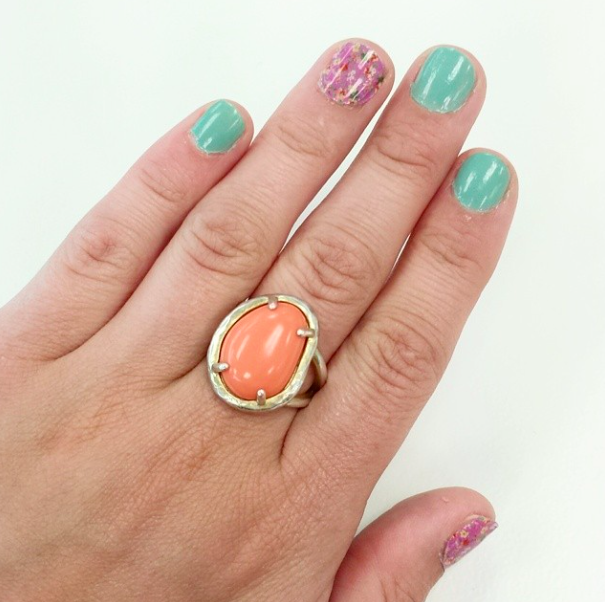
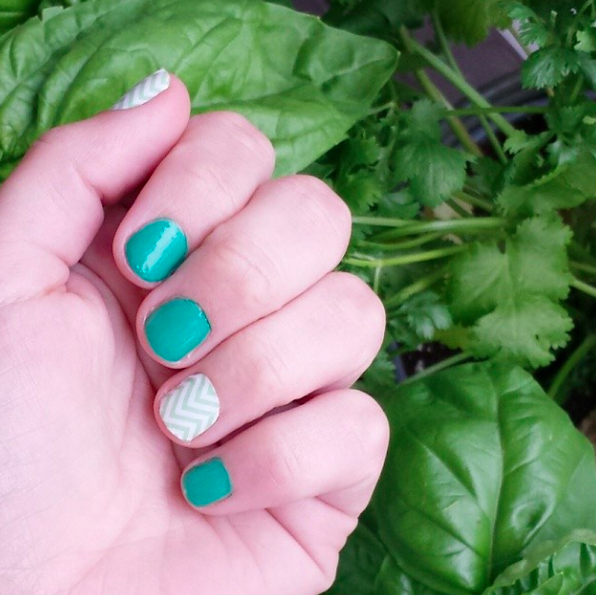
Take a look below for some designs that I have created with my Jamberry nails.


Cute designs! I’d love to hear how long they lasted and whether you found them easy to apply or not. I have tried nail wraps before and was disappointed at how difficult it was to get them on properly and how short they lasted.